


Monday, December 20, 2010
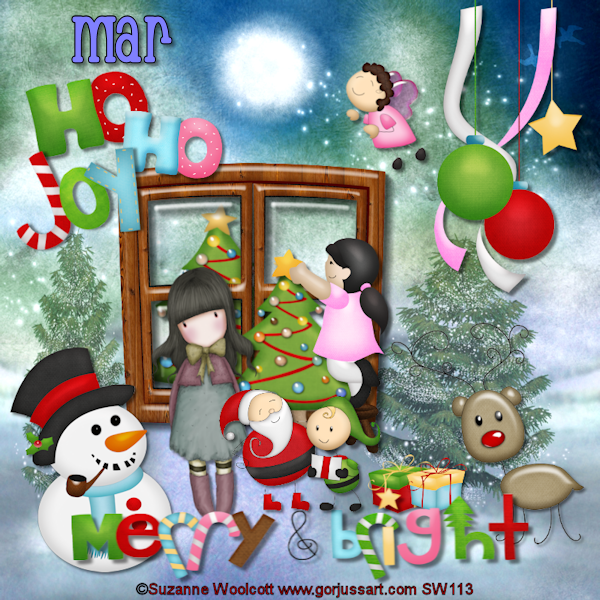 I made this tag with a amazing new Christmas ScrapKit from Mar, its called " MerryandBright "
You can purchase it from Mar's Store here
You can also view Mar's Blog here
I also used a font called " Chachie " you can find it here
Mar what a unique and charming ScrapKit, it was so much fun playing with it and coming up with this tutorial
Keep up the good work
Hugs lee xx
------------------------
* I will complete this tutorial after dinner
I made this tag with a amazing new Christmas ScrapKit from Mar, its called " MerryandBright "
You can purchase it from Mar's Store here
You can also view Mar's Blog here
I also used a font called " Chachie " you can find it here
Mar what a unique and charming ScrapKit, it was so much fun playing with it and coming up with this tutorial
Keep up the good work
Hugs lee xx
------------------------
* I will complete this tutorial after dinner
Saturday, December 18, 2010
 For this tutorial l used a ScrapKit from Tamsin McAtee Studios called " Roasting Chestnuts"
You can view Tamsin's Blog and Store here
The Font l used is O Autographic DNA, you can find it here
l also used a mask from Vix's Christmas 2010 collection, it was number 4 c you can find it here
The tube l selected is from Sue Miller's collect, you can find her work at My Tag Art here
Tamsin your ScrapKit's are always unique and charming, l always enjoy using them
I normally do a layout with Tamsin's work but this time l thought a Tutorial would be nice
Hugs lee xx
---------------------
This tag is very simple to make, l wanted it to look like Santa's in the starlight waiting for Christmas Eve. A Dream Tag you mite say.
It started with a 800 x 800 image and l add paper 1 then went to layers, load/save mask and selected my mask and hit load
Then l selected fireplace and resized it to 440 and placed it in the centre of the mask adding a drop shadow of 4
Paper12 came next and was resized to 450 then send below the fireplace to give the fireplace a look as if a wall was behind it
The Glitter came next and was resized a factor once it was on the tag and moved into place with a drop shadow of 2
Baublestring was next and once it was resized to 220 with some adjustment it was put into place on the fireplace with a drop shadow of 3
The floor came next after a resizing to 300 it was put into place with some adjustment and given a drop shadow of 3
I added the tube next and duplicated it then mirroring it to show two santa's, a drop shadow of 4 was also added
Berries 2 was the last element, after resizing to 150 it was add to the tag laying across the floor between the two santa's and a drop shadow of 3 was added
Licence details and Tamsin name were the last details.
Hugs lee xx
For this tutorial l used a ScrapKit from Tamsin McAtee Studios called " Roasting Chestnuts"
You can view Tamsin's Blog and Store here
The Font l used is O Autographic DNA, you can find it here
l also used a mask from Vix's Christmas 2010 collection, it was number 4 c you can find it here
The tube l selected is from Sue Miller's collect, you can find her work at My Tag Art here
Tamsin your ScrapKit's are always unique and charming, l always enjoy using them
I normally do a layout with Tamsin's work but this time l thought a Tutorial would be nice
Hugs lee xx
---------------------
This tag is very simple to make, l wanted it to look like Santa's in the starlight waiting for Christmas Eve. A Dream Tag you mite say.
It started with a 800 x 800 image and l add paper 1 then went to layers, load/save mask and selected my mask and hit load
Then l selected fireplace and resized it to 440 and placed it in the centre of the mask adding a drop shadow of 4
Paper12 came next and was resized to 450 then send below the fireplace to give the fireplace a look as if a wall was behind it
The Glitter came next and was resized a factor once it was on the tag and moved into place with a drop shadow of 2
Baublestring was next and once it was resized to 220 with some adjustment it was put into place on the fireplace with a drop shadow of 3
The floor came next after a resizing to 300 it was put into place with some adjustment and given a drop shadow of 3
I added the tube next and duplicated it then mirroring it to show two santa's, a drop shadow of 4 was also added
Berries 2 was the last element, after resizing to 150 it was add to the tag laying across the floor between the two santa's and a drop shadow of 3 was added
Licence details and Tamsin name were the last details.
Hugs lee xx
 I am using a ScrapKit from Susan for this tutorial, its called " Koala Christmas "
You can view Susan's Blog Tootypup Scraps here
The ScrapKit can be purchased from Aussie Scrap Designs here
The Font l used is O Autographic DNA, you can find it here
l also used a mask from Vix's Christmas 2010 collection, it was number 4 c you can find it here
The tube l selected is from Ismael Rac's free range, you can find it here
Susan your Scrapkits are amazing, cant wait to see what you come up with for New Years
Hugs lee xx
-------------------
I started this tag of with a 800 x 800 image and add paper8 then went to layers, load/save mask and selected my mask and hit load
Then l selected tree3 and resized it to 450 and duplicated it, mirroring the second copy to give a appearance of a forest of Christmas trees. Next l add tree2 which was also resized to 450 and duplicated and mirrored to assist in that forest, all 4 tree's received a drop shadow of 4
Arrangement2 was also resized to approxly 260 and duplicated, mirrored once it was in place a drop shadow of 4 was add to both of them
Next came the tube which l mirrored and adjusted the size, then tucked it in between the Christmas Tree's with a drop shadow of 6
TreeStumps was resized and placed in front of the front tree3 then given a drop shadow of 3
LampKoala2 was resized to 130 and put into place then duplicated and the 2rd copy was mirrored and both received a drop shadow of 4
Licence Details and Susan's Name were the last two things added
Hugs lee xx
I am using a ScrapKit from Susan for this tutorial, its called " Koala Christmas "
You can view Susan's Blog Tootypup Scraps here
The ScrapKit can be purchased from Aussie Scrap Designs here
The Font l used is O Autographic DNA, you can find it here
l also used a mask from Vix's Christmas 2010 collection, it was number 4 c you can find it here
The tube l selected is from Ismael Rac's free range, you can find it here
Susan your Scrapkits are amazing, cant wait to see what you come up with for New Years
Hugs lee xx
-------------------
I started this tag of with a 800 x 800 image and add paper8 then went to layers, load/save mask and selected my mask and hit load
Then l selected tree3 and resized it to 450 and duplicated it, mirroring the second copy to give a appearance of a forest of Christmas trees. Next l add tree2 which was also resized to 450 and duplicated and mirrored to assist in that forest, all 4 tree's received a drop shadow of 4
Arrangement2 was also resized to approxly 260 and duplicated, mirrored once it was in place a drop shadow of 4 was add to both of them
Next came the tube which l mirrored and adjusted the size, then tucked it in between the Christmas Tree's with a drop shadow of 6
TreeStumps was resized and placed in front of the front tree3 then given a drop shadow of 3
LampKoala2 was resized to 130 and put into place then duplicated and the 2rd copy was mirrored and both received a drop shadow of 4
Licence Details and Susan's Name were the last two things added
Hugs lee xx
Friday, December 17, 2010
 This layout was made using a ScrapKit called " Sunburnt Christmas " from Stina
You can view Stina's Blog here
You can also purchase the ScrapKit from Aussie Scrap Designs here
The photo is my girlfriend's 5 year old son " Leonardo"
Stina your work improves and surprises us more and more with every kit, your a amazing designer
Hugs lee xx
This layout was made using a ScrapKit called " Sunburnt Christmas " from Stina
You can view Stina's Blog here
You can also purchase the ScrapKit from Aussie Scrap Designs here
The photo is my girlfriend's 5 year old son " Leonardo"
Stina your work improves and surprises us more and more with every kit, your a amazing designer
Hugs lee xx

For this tag l used a ScrapKit called " Sunburnt Christmas " from Stina
You can view Stina's Blog here
The ScrapKit can be purchased from Aussie Scrap Designs here
The font l used is called A&S Snapper Script, you can find it here
The tube l selected is a free one from Sue Miller, you can view her work here at My Tag Art
Stina you continue to surprise me with more amazing ScrapKit's than the last one you do
Keep up the good work
Hugs lee xx
------------------------
l began this tag with a 800 x 800 transparent image and add paper02, this paper did not need any resizing.
Next l selected frame01 and resized it to 560and angled it to the left a factor, then l selected paper09 and resized it to 460 and send it below the frame and making any added adjustments. Adding a drop shadow of 7 to the frame
Bow04 came next and after some size adjustments and mirroring it l placed it in the left top corner of the under the frame, adding a drop shadow of 4
GumFlower02 was next and after a resizing to 250 and mirroring l send it below the frame, duplicating it and placing the 2 copies and a different angle above the bow just showing a touch of the gumflower. Then adding a drop shadow of 3
Tree03 was the next element l selected and after a resizing and some adjustment it was put into place with a drop shadow of 4
The Southern Cross after a resizing of 450 l put it into place and added a drop shadow of 5
Poinsettia came next and after a resizing to 130 it was added to the tag and duplicated twice, then placed in between the little red dummer Koala and lantern03. All then received a drop shadow of 4
DriedLeavesScatter was selected next and mirrored then angled and send below the frame with a dried flower just appearing, it then received a drop shadow of 3
The tube was placed to the right of the frame and l gave it a drop shadow of 3
Last was the name or and wordart plus the licence details
Hugs lee xx
Monday, December 6, 2010


I have taken a big step in the psp world and joined in on a Blog Train.
This is something very new to me, so l hope you all enjoy what l have put together
You may find due to Time Zones not all the designers will have their work posted at the same time, so please pop back and pick up there part when it is ready.
You can download my parts here and here.
***The links are now working
Gail ( Aussie Scrap Design's ) thank you for allowing me to be part of this amazing train.
You can view the Train's Blog here and Aussie Scraps here
Hugs lee xx
Please view the other designers in this train below
Saturday, December 4, 2010
 This tag was made using the amazing work of Stina's, her ScrapKits are amazing
This ScrapKit is part of a Collab from Aussie Scrap Designs, its called " Santa's Secrets"
You can find it here
You can also view Stina's blog here
I used Vix_Mask5c from her Christmas 2010 collect, you can find it here
I also used a font called A&S Snapper Script for this tag you can find it here
I selected the tube l used was from Elias Chatzoudis, you can purchase it here
Stina what a cool Christmas Scrapkit, awesome work. Hope you like my results
Hugs lee xx
----------------------
This tag was made using the amazing work of Stina's, her ScrapKits are amazing
This ScrapKit is part of a Collab from Aussie Scrap Designs, its called " Santa's Secrets"
You can find it here
You can also view Stina's blog here
I used Vix_Mask5c from her Christmas 2010 collect, you can find it here
I also used a font called A&S Snapper Script for this tag you can find it here
I selected the tube l used was from Elias Chatzoudis, you can purchase it here
Stina what a cool Christmas Scrapkit, awesome work. Hope you like my results
Hugs lee xx
----------------------I know it may look strange using the same mask as the last tag but l really felted it would suit this tag also, it began with a 700 x 700 image and l add paper 1 and went to layers. load/save mask and selected my mask then hitting the load button
Santa's napping no 2 came next after a slight adjustment in the size l add it to the centre of the mask with a drop shadow of 4
The Star came next and after a resizing to 130 l add it to the top of the tree with a drop shadow of 2
The train came next and after a resizing to 140 with someadjustmant it was placed in front of the fireplace with a drop shadow of 3
Presents02 were resized to 60 and add to the tag below the tree with some minor adjustments and a drop shadow of 3
Dove01 was the last elements and after it was also resized to 120 l added it to the right of the tree with a drop shadow of 2
The tube was add last and placed to the right side of the fireplace with a drop shadow of 3
Last l added was the Licence details and Stina's name
Hugs lee xx
 This tag was made using a ScrapKit for Jen from Sweet Temptations
The ScrapKit is part of a Collab called " Santa's Secrets " from Aussie Scrap Designs
You can find it here
You can view Jen's Blog here
I also used a mask from Vix_Mask5c from her Christmas 2010 collect, you can find it here
The font used is A&S Snapper Script, you can find it here
Jen l hope you like what l did with your ScrapKit, l loved playing with it and l hope l can do some of your other work in 2011
Hugs lee xx
----------------------
I started this tag of with a 700 x 700 image and add paper 3 and clicked layers then load/save mask and selected my mask followed by the hit key
Lightup1 came first and after a resizing to 450 l add it to the tag with a drop shadow of 4
Santa1 came next and after a resizing to 300 l add it to the right of the tag l also gave him a drop shadow of 3
Snowman1 came next after a resized to 160 l added it in front of Santa on the right of the tag, adjusting the size a factor and adding a drop shadow of 3
Sled1 was the next element and after a resizing to 250 plus l mirrored it, adding a drop shadow of 2
Ornament7 was the last element and after a resizing to 250 l added it to the left top side of the tag adding a drop shadow of 3
Next came the tubes from Tooshtoosh's Christmas Collect, free to use tubes. You can find them here
Licence details and Jen's name are luck last
Hugs lee xx
This tag was made using a ScrapKit for Jen from Sweet Temptations
The ScrapKit is part of a Collab called " Santa's Secrets " from Aussie Scrap Designs
You can find it here
You can view Jen's Blog here
I also used a mask from Vix_Mask5c from her Christmas 2010 collect, you can find it here
The font used is A&S Snapper Script, you can find it here
Jen l hope you like what l did with your ScrapKit, l loved playing with it and l hope l can do some of your other work in 2011
Hugs lee xx
----------------------
I started this tag of with a 700 x 700 image and add paper 3 and clicked layers then load/save mask and selected my mask followed by the hit key
Lightup1 came first and after a resizing to 450 l add it to the tag with a drop shadow of 4
Santa1 came next and after a resizing to 300 l add it to the right of the tag l also gave him a drop shadow of 3
Snowman1 came next after a resized to 160 l added it in front of Santa on the right of the tag, adjusting the size a factor and adding a drop shadow of 3
Sled1 was the next element and after a resizing to 250 plus l mirrored it, adding a drop shadow of 2
Ornament7 was the last element and after a resizing to 250 l added it to the left top side of the tag adding a drop shadow of 3
Next came the tubes from Tooshtoosh's Christmas Collect, free to use tubes. You can find them here
Licence details and Jen's name are luck last
Hugs lee xx
 I made this tag using a ScrapKit by Lynne from Baby Scraps
The ScrapKit is part of a Collab called " Santa's Secret's "
You can find it at Aussie Scrap Designs here
You can also view Baby Scraps, Lynne's blog here
I used a Vix Mask from her Christmas 2010 collect, you can find it here
Angela Newman Tube was also used in this tag, you can find her work here
The font used is A&S Snapper Script, you can find it here
Lynne your kits are always very special this one goes a long way as one of your best. Keep up the good work.
Hugs lee xx
-------------------------
I began this tag with a 700 x 700 image and add paper Green Flake then went to Layers, Load/save Mask and selected my mask and hit load
Then l resized the Candy House to 250 and add it to the left side of the mask, duplicating it so the second one is placed on the right side with both getting a drop shadow of 4
BSCTree came next and after a resizing to 450 l added it to the centre of the candy houses with a drop shadow of 4
RedStarFlower came next and was add to the right top side after a resizing to 200 with a drop shadow of 3
I selected a Angela Newman tube for this tag, tucked it behind the Tree as if it was surprising you
Last l add the licence details and Lynne's name
Hugs lee xx
I made this tag using a ScrapKit by Lynne from Baby Scraps
The ScrapKit is part of a Collab called " Santa's Secret's "
You can find it at Aussie Scrap Designs here
You can also view Baby Scraps, Lynne's blog here
I used a Vix Mask from her Christmas 2010 collect, you can find it here
Angela Newman Tube was also used in this tag, you can find her work here
The font used is A&S Snapper Script, you can find it here
Lynne your kits are always very special this one goes a long way as one of your best. Keep up the good work.
Hugs lee xx
-------------------------
I began this tag with a 700 x 700 image and add paper Green Flake then went to Layers, Load/save Mask and selected my mask and hit load
Then l resized the Candy House to 250 and add it to the left side of the mask, duplicating it so the second one is placed on the right side with both getting a drop shadow of 4
BSCTree came next and after a resizing to 450 l added it to the centre of the candy houses with a drop shadow of 4
RedStarFlower came next and was add to the right top side after a resizing to 200 with a drop shadow of 3
I selected a Angela Newman tube for this tag, tucked it behind the Tree as if it was surprising you
Last l add the licence details and Lynne's name
Hugs lee xx
Wednesday, December 1, 2010

This tag was made using Tammy's " GirlyChristmas " You can view Tammy's Blog here You can purchase the ScrapKit at Aussie Scrap Designs here
I also used Vix_Mask432, you can find it here The font used is 2Peas Mister Giggles, you can also find that here Tammy your scrapkit's are always a joy to use, this one goes up the top with the rest of them
Hugs lee xx
------------------------
I began this tag with a 800 x 800 image and add papers 8 and 9 at different times, after adding each l want to layers, load/save mask and selected my mask. The same mask was adding each time to give the tag a look of added colours and stars.
Frame 4 was next once it was copied and paste to the centrea of the mask l add Tree 1 after l resized it to 460, placed it in front of the frame and added a drop shadow of 4
Sign 1 was the next element and after a resizing to 350 l add it to the left of the tree and wrote " Santa and North Pole " of it. Then adding a drop shadow of 5
Dove1 was resized to 120 and add to the tag just above the sign to the left of the tree and a drop shadow of 3 was added
Bow4 came next and after l resized it to 250 l angled it and put it in place to the left top of the tree adding a drop shadow of 4
Box1 and 3 are the last elements, after resizing them to 60 and popped into place with one duplicate l added a drop shadow of 2 to all three
Last l added the WordArt and Tammy's name
Also the Licence details
Hugs lee xx


I like to now and then do something a bit different with ScrapKits, Tutorials and Layouts.
Here its is, l used a ScrapKit called " CuppieCake "
Its from TamsinAtee and you can purchase it from here
You can also view her Blog here
Tamsin what a amazing Scrapkit with a good select of colors and style
Hugs lee xx
Monday, November 29, 2010
 I used a Scrapkit called " JoyfulTimes " for this layout from Lise_Lotte
You can purchase the ScrapKit from Digital Scrap World here
You can also find Lise_Lotte's blog here
Lise its a sweet ScrapKit with amazing papers and elements, l enjoyed playing with all parts of this kit.
Hugs lee xx
-----------------------
I began by using a 800 x 800 image and add paper 04 once it was resized to 800
Then l added paper Solid_Blue after it was resized to 600 l add it to the centre of the layout adding a drop shadow of 7
Next l selected Frame01 and resized it to 500 before adding it to the layout, once added and put into place l add a drop shadow of 6
The photo came next and l add it after l resized it to 500 then send it down under the frame with adjusting the size of the photo once it was in place
CurlRibbon was first resized to 700 then add to the layout and put into place followed by send down below the Blue paper and a drop shadow of 4 was given
Reindeer came next and after a resizing to 150 and mirrored it was put into place and duplicated twice, the other two had their sizes adjusted and put into place to show a small group of Deer. A drop shadow of 4 was add to each one
Poinsettia01 was came next, after a size rejustment to 120 it was add to the layout and placed towards the centre right corner of the blue layer with a drop shadow of 2
Button03 came next after a resizing to 150 it was placed to the left of the poinsettia and add a drop shadow of 2
DualCandyCane was next, after a resizing to 120 l angled it and placed it in the left corner of the photo duplicating it and also angling the 2rd copy to look as if their is a bundle of candy cane, all received a drop shadow of 2
ButtonKit01 is the 2nd last element l selected, once it was resized l placed it down towards the bottom of the frame tucked under the joyful button a little and add a drop shadow of 2
BadgeKit 01 was the last element after a resizing to 120 and some adjustment it was add to the right corner of the frame.
The layout is complete add any copyright or licence's
Hugs lee xx
I used a Scrapkit called " JoyfulTimes " for this layout from Lise_Lotte
You can purchase the ScrapKit from Digital Scrap World here
You can also find Lise_Lotte's blog here
Lise its a sweet ScrapKit with amazing papers and elements, l enjoyed playing with all parts of this kit.
Hugs lee xx
-----------------------
I began by using a 800 x 800 image and add paper 04 once it was resized to 800
Then l added paper Solid_Blue after it was resized to 600 l add it to the centre of the layout adding a drop shadow of 7
Next l selected Frame01 and resized it to 500 before adding it to the layout, once added and put into place l add a drop shadow of 6
The photo came next and l add it after l resized it to 500 then send it down under the frame with adjusting the size of the photo once it was in place
CurlRibbon was first resized to 700 then add to the layout and put into place followed by send down below the Blue paper and a drop shadow of 4 was given
Reindeer came next and after a resizing to 150 and mirrored it was put into place and duplicated twice, the other two had their sizes adjusted and put into place to show a small group of Deer. A drop shadow of 4 was add to each one
Poinsettia01 was came next, after a size rejustment to 120 it was add to the layout and placed towards the centre right corner of the blue layer with a drop shadow of 2
Button03 came next after a resizing to 150 it was placed to the left of the poinsettia and add a drop shadow of 2
DualCandyCane was next, after a resizing to 120 l angled it and placed it in the left corner of the photo duplicating it and also angling the 2rd copy to look as if their is a bundle of candy cane, all received a drop shadow of 2
ButtonKit01 is the 2nd last element l selected, once it was resized l placed it down towards the bottom of the frame tucked under the joyful button a little and add a drop shadow of 2
BadgeKit 01 was the last element after a resizing to 120 and some adjustment it was add to the right corner of the frame.
The layout is complete add any copyright or licence's
Hugs lee xx
 I made this layout using a amazing ScrapKit from a good friend Mar
The ScrapKit is called " ExquisiteChristmas "
You can purchase it at Mar's Store here
You may also like to take a browse at Mar's Blog here
The photo is my neice Kylie and her daughter Jolie with at the time my youngest great nephew Brody, his 1 in a few weeks.
Mar always makes some unique Kits and elements which truely makes her work so unique.
Keep it up Mar
Hugs lee xx
I made this layout using a amazing ScrapKit from a good friend Mar
The ScrapKit is called " ExquisiteChristmas "
You can purchase it at Mar's Store here
You may also like to take a browse at Mar's Blog here
The photo is my neice Kylie and her daughter Jolie with at the time my youngest great nephew Brody, his 1 in a few weeks.
Mar always makes some unique Kits and elements which truely makes her work so unique.
Keep it up Mar
Hugs lee xx


I used the amazing work from Tamsin called " Land of make Beleive " for these layouts
You can purchase the Scrapkit and Page kit from her store here
You can also view Tamsin's Blog here
Tamsin l am so proud to work with you and use you amazing work, l cant wait to start more layouts and some Tutorials with your Kits.
Hugs lee xx
Sunday, November 28, 2010


Saturday, November 27, 2010


I used a ScrapKit called " From this moment " for these layouts
Its a amazing Scrapkit made with love from Lissa's you can purchase it from here store here
You can also view Lissa's Blog here
HunnyBeeDesigns is a new project of Lissa's and l must say she is a amazing designer
Keep up the good work
Hugs lee xx
Tuesday, November 23, 2010


 I made these layouts with a amazing collab ScrapKit from creationFrenchgirl
" WalkingFoggyWoods "
You can view creationFrenchgirl's blog here
You can purchase the bundle and its add ons from here and here
The photos are from my collect, my neices and a lily pond in Ballarat
creationFrenchgirl another amazing and unique scrapkit, its a joy playing with your kits
Hugs lee xx
I made these layouts with a amazing collab ScrapKit from creationFrenchgirl
" WalkingFoggyWoods "
You can view creationFrenchgirl's blog here
You can purchase the bundle and its add ons from here and here
The photos are from my collect, my neices and a lily pond in Ballarat
creationFrenchgirl another amazing and unique scrapkit, its a joy playing with your kits
Hugs lee xx
Monday, November 22, 2010

 I made these layouts with a ScrapKit called " Purple Garden " from Rieneke Designs
You can find the ScrapKit at Misses Beehaven here
This ScrapKit is both amazing aand gentle in its elements and papers, a true joy to work with and one of my favorite colours lol
Hugs lee xx
I made these layouts with a ScrapKit called " Purple Garden " from Rieneke Designs
You can find the ScrapKit at Misses Beehaven here
This ScrapKit is both amazing aand gentle in its elements and papers, a true joy to work with and one of my favorite colours lol
Hugs lee xx
Saturday, November 20, 2010
 I made this layout using a ScrapKit called " Citrus Fantasy " from Karen at Karens Scraps and Graphics
You can view Karen's blog here
Also you can purchase the ScrapKit here at Misses Beehaven
The photos are my from my nephews wedding
Karen what a pretty kit, the gentle colours and elements make it amazing
Hugs lee xx
I made this layout using a ScrapKit called " Citrus Fantasy " from Karen at Karens Scraps and Graphics
You can view Karen's blog here
Also you can purchase the ScrapKit here at Misses Beehaven
The photos are my from my nephews wedding
Karen what a pretty kit, the gentle colours and elements make it amazing
Hugs lee xx
 For this tag l used a Sampler kit from Stina called " Christmas Memories "
It is part of a blog train, you can find the sampler here on Stina's Blog
The full ScrapKit Can be purchased from Aussie Scrap Designs here
I used a Vix_Mask437 you can find it here
l also used 2Peas Mister Giggles font for Stina's name, you can find it here
For this tag l didnt use any tubes, l felted it looked amazing without them
Stina the elements and papers are amazing if the sampler is just a small percent of what the full kit is taggers will enjoy this kit
Hugs lee xx
-------------------------
I began this tag with a 800 x 800 image and add paper18 then went to layers. load/save mask and selected my mask
Next came Vintage Carolers after a resizing to 480 l add it to the tag moving it so the writing on the mask was showing and adding a drop shadow of 4
Bells03 came next and after they were resized to 50 l placed them on the top left corner of the shop with a drop shadow of 3, this was done to cover up the word " Joy " as part was hide by the store frame
Lamppost 02 came next and after a resizing to 420 it was add to the left of the tag and a drop shadow of 4 was added
SantaClaus02 was the last element added, after resizing to 250 it was added to the tag in front of the store and l added a drop shadow of 4
Stina's copyright and name were added last to complete the tag
Hugs lee xx
For this tag l used a Sampler kit from Stina called " Christmas Memories "
It is part of a blog train, you can find the sampler here on Stina's Blog
The full ScrapKit Can be purchased from Aussie Scrap Designs here
I used a Vix_Mask437 you can find it here
l also used 2Peas Mister Giggles font for Stina's name, you can find it here
For this tag l didnt use any tubes, l felted it looked amazing without them
Stina the elements and papers are amazing if the sampler is just a small percent of what the full kit is taggers will enjoy this kit
Hugs lee xx
-------------------------
I began this tag with a 800 x 800 image and add paper18 then went to layers. load/save mask and selected my mask
Next came Vintage Carolers after a resizing to 480 l add it to the tag moving it so the writing on the mask was showing and adding a drop shadow of 4
Bells03 came next and after they were resized to 50 l placed them on the top left corner of the shop with a drop shadow of 3, this was done to cover up the word " Joy " as part was hide by the store frame
Lamppost 02 came next and after a resizing to 420 it was add to the left of the tag and a drop shadow of 4 was added
SantaClaus02 was the last element added, after resizing to 250 it was added to the tag in front of the store and l added a drop shadow of 4
Stina's copyright and name were added last to complete the tag
Hugs lee xx

This tag was made using a amazing ScrapKit by Star called " Christmas Past "
You can view Star's blog " Stargazer Musings " here
You can also purchase the scrapkit at Ausssie Scrap Designs here
l also used " Black Jack " for Star's name, you can find it here
The tubes l used are from Susan McKivergan, you can now find her work at UpYourArt here
Star the elements and papers in this kit are amazing, l just love the style of this kit and its truely a Christmas Past
Hugs lee xx
--------------------------
For this tag it started with a 800 x 800 image and l added paper 12
Then l selected Goldframe 2 and resized it to 500, making a further adjustment so the frame would sit nicely in the left corner adding a drop shadow of 7
Then l add Christmas Tree 1 and after a resizing to 400 l added it to the left side of the frame and adding a drop shadow of 4
Present's 1 and 2 plus tied parchment1 were all next and after resizing them to 100 l added them to the bottom of the frame so they looked asif they were sitting around the tree, they all received a drop shadow of 2
Christmas Banner 1 was next and was add to the tag after a resizing to 250 and angled l added a drop shadow of 4
RedStar1 was the last element, it was resized to 200 and angled so it would fit under the left side of the banner just showing the points, a drop shadow of 3 was then added
Last l selected the tubes from Susan McKivergan and resized them to fit nicely in their spots of the tag adding a drop shadow of 5
Licence details plus Star's name came next to complete the tag
Hugs lee xx
Thursday, November 18, 2010

Calling all designers. The Aussie Scraps Christmas Sleigh Ride Blog Train Departs the Station 8th December. We would love to have you all join us. Just go to the blog and grab the color swatch and blinkie. Post the ad on your blog along with the blinkie and then email us your name and your blog URL. Keep checking back to the blog for updates. :) Come on, let's make this the ride of our lives!
This week a girlfriend of my Gail from Aussie Scrap Designs challenged me to make a Christmas look for my Blog.
I hope you all like it as much as l do, thank you Gail your a awesome friend.
I used the amazing work of Valentina's Creations
The kit l used is called " FairyChristmas "
You can view Valentina's Blog here and her store here if you wish to view her other work
Her work amazings me, its so unique and l am so pleased to use it.
Hugs lee xx
Monday, November 15, 2010
 I used another one of Stina's amazing ScrapKits for this tag called " A little goes a long way "
You can find it on Stina's blog here
l also used one of Gems_ Masks 27 you can find her masks here
For this tag l used A&S Snapper Script, you can find it here
l used one of Suzanne Woolcott's amazing tubes as well on this tag, you can find her work here
Stina you work never fails to surprise me, you select some amazing papers and elements.
Keep up the good work
Hugs lee xx
--------------------------
This tag started with a 800 x 800 image, then l added paper11 then went to layers, load/save mask and picked Gems_Mask27, hit load
Next came frame6 and l added it to the centre of the mask, following this with frame7 which l sent down below frame6 and angled it to show the white flowers at the top of frame
Paper6 came next and after a resizing to 400 l sent it below frame6 and angled it, then a duplicated it and moved the copy to the other frame, giving frame6 a drop shadow of 5 and frame7 received 4
Heartscatter01 came next and was angled to the left with a drop shadow of 3, then send below the frame so only part was showing
GlitterButterfly03 was added next after it was resized to 120 and angled to the right a drop shadow of 3 was added
Flower04 was the last element, once it was resized to 220 and slipped into the left frame with a drop shadow of 2
Last was the image and l selected that from Suzanne Woolcott's select of amazing tubes, adding it to the right frame with a drop shadow of 3
Then adding the squirrel from that image to the bother middle of the frame
The licence details and Stina's name were added last
Hugs lee xx
I used another one of Stina's amazing ScrapKits for this tag called " A little goes a long way "
You can find it on Stina's blog here
l also used one of Gems_ Masks 27 you can find her masks here
For this tag l used A&S Snapper Script, you can find it here
l used one of Suzanne Woolcott's amazing tubes as well on this tag, you can find her work here
Stina you work never fails to surprise me, you select some amazing papers and elements.
Keep up the good work
Hugs lee xx
--------------------------
This tag started with a 800 x 800 image, then l added paper11 then went to layers, load/save mask and picked Gems_Mask27, hit load
Next came frame6 and l added it to the centre of the mask, following this with frame7 which l sent down below frame6 and angled it to show the white flowers at the top of frame
Paper6 came next and after a resizing to 400 l sent it below frame6 and angled it, then a duplicated it and moved the copy to the other frame, giving frame6 a drop shadow of 5 and frame7 received 4
Heartscatter01 came next and was angled to the left with a drop shadow of 3, then send below the frame so only part was showing
GlitterButterfly03 was added next after it was resized to 120 and angled to the right a drop shadow of 3 was added
Flower04 was the last element, once it was resized to 220 and slipped into the left frame with a drop shadow of 2
Last was the image and l selected that from Suzanne Woolcott's select of amazing tubes, adding it to the right frame with a drop shadow of 3
Then adding the squirrel from that image to the bother middle of the frame
The licence details and Stina's name were added last
Hugs lee xx

I used a Scrapkit from Pink called " A little goes a long way " for this tutorial
You can find it on Pink's blog " Pink's Poetic Scraps " here
I used Gems_Mask8 for this tag also, you can find her masks here
I also used A&S Jiggy Roman for this tag, you can find it here
I also added one of Suzanne Woolcott's amazing tubes, you can find her work here
Pink l really love the elements in this Scrapkit they are both fun and so cute, awesome work
Hugs lee xx
----------------------
I started this tag with a 800 x 800 image and added paper 3 then went to layers, load/save mask and hit load
Then started adding the elements
Scarecrow came first, l resized it to 350 and add it to the centre of the tag just sitting under the mask with a drop shadow of 3
The sunflower was resized to 220 and duplicated then mirrored so there would be one on each side of the scarecrow, sitting just under the mask and a drop shadow of 2
Sunflower 1 was resized to 120 and placed just above the sunflower then duplicated and mirrored on the left of the scarecrow and tucked down under the mask with a drop shadow of 2
Horn of plenty came next, after a resizing to 120 l placed it in the centre of the scarecrows feet with a drop shadow of 2
Toby turkey came next, it was resized to 100 and add to the left side of the scarecrow with a drop shadow of 2
Big pumpkin was the last element added, after it was resized to 60 and add to the left side of tag in front of the turkey a drop shadow of 2 was added
Last, l added Suzanne Woolcott's gorjuss tube, duplicating it and mirroring it as well then senting the 2nd copy down behind the mask so all you see is the face and a arm peeking out over the turkey. Drops shadow of 4 was added to both
I added the WordArt and the licence details, plus pink's name last
Hugs lee xx
 The Scrapkit l used for this tutorial is from Susan at Tootypup Scraps here
Its called " A little goes a long way "
l used a Font called A&S Christmas Script you can find it here
The Mask l used is from Gems_Mask8, you can find her masks here
I also used one of Suzannes amazing Gorjuss tubes, you can find all her work here
Susan its a cute little Scrapkit with the same amazing elements you put into all your ScrapKits
Hugs lee xx
-------------------
This tutorial began with a 700 x 700 image, next l added paper 11 and went to layers then load/save mask and selected my mask Gems_Mask8 and hit load
I left the mask layer open for the next stage
Flowers2 came next, l add it to the mask layer and angled it slightly to the left and add a drop shadow of 2
Waterpump3 was next, after a adjustment to the size once it was placed on the tag, l moved it to the left a factor and duplicated it sending the second copy down under the mask then moving it to the left of the orginal one giving the look of a shadow, all received a drop shadow of 4
The next element was lantern1 and after a resizing to 250 l add it to the right of the waterpump at the top corner, adding a drop shadow of 2
GardenTag1 came next and after a resizing to 60 it was placed on the top part of the pump
Next l selected the image from Suzanne Woolcott's collection and paste it to the tag sending a duplicate copy down under the mask and to the right of the orginal one, adding a drop shadow of 3 to both
Last was Butterflyscrap1 after a resizing to 150 l added it to the tag on a slight angle and adding a drop shadow of 3
Licence details and Susan's name are last
Hugs lee xx
The Scrapkit l used for this tutorial is from Susan at Tootypup Scraps here
Its called " A little goes a long way "
l used a Font called A&S Christmas Script you can find it here
The Mask l used is from Gems_Mask8, you can find her masks here
I also used one of Suzannes amazing Gorjuss tubes, you can find all her work here
Susan its a cute little Scrapkit with the same amazing elements you put into all your ScrapKits
Hugs lee xx
-------------------
This tutorial began with a 700 x 700 image, next l added paper 11 and went to layers then load/save mask and selected my mask Gems_Mask8 and hit load
I left the mask layer open for the next stage
Flowers2 came next, l add it to the mask layer and angled it slightly to the left and add a drop shadow of 2
Waterpump3 was next, after a adjustment to the size once it was placed on the tag, l moved it to the left a factor and duplicated it sending the second copy down under the mask then moving it to the left of the orginal one giving the look of a shadow, all received a drop shadow of 4
The next element was lantern1 and after a resizing to 250 l add it to the right of the waterpump at the top corner, adding a drop shadow of 2
GardenTag1 came next and after a resizing to 60 it was placed on the top part of the pump
Next l selected the image from Suzanne Woolcott's collection and paste it to the tag sending a duplicate copy down under the mask and to the right of the orginal one, adding a drop shadow of 3 to both
Last was Butterflyscrap1 after a resizing to 150 l added it to the tag on a slight angle and adding a drop shadow of 3
Licence details and Susan's name are last
Hugs lee xx
Thursday, November 11, 2010

 These amazing layouts were made with a ScrapKit called " Girly Winter " from Kristen
You can find the Scrapkit here
You can also purchase it from " Scraps from the heart " here
You can download these layouts from here and here
I am new to layouts and even newer to blank ones, so please let me know how you go with these
Kristen its always a pleasure using your scrapkits
Hugs lee xx
These amazing layouts were made with a ScrapKit called " Girly Winter " from Kristen
You can find the Scrapkit here
You can also purchase it from " Scraps from the heart " here
You can download these layouts from here and here
I am new to layouts and even newer to blank ones, so please let me know how you go with these
Kristen its always a pleasure using your scrapkits
Hugs lee xx
Monday, November 8, 2010
 I used the amazing Scrapkit called " Girly Winter" from Kristen for this layout
You can find it here
And you can purchase it at " Scraps from the Heart " here
A&S Christmas Script was used for the WordArt, you can find it here
The photo is my great neice Jolie her grandmother my sister Marcia took it last Christmas
Kristen l really adore the pinks you used in this ScrapKit, awesome work
Hugs lee xx
I used the amazing Scrapkit called " Girly Winter" from Kristen for this layout
You can find it here
And you can purchase it at " Scraps from the Heart " here
A&S Christmas Script was used for the WordArt, you can find it here
The photo is my great neice Jolie her grandmother my sister Marcia took it last Christmas
Kristen l really adore the pinks you used in this ScrapKit, awesome work
Hugs lee xx
 For this tag l used a amazing and sweet ScrapKit called " Frosty " from Kristen
You can find it here on her blog
You can purchase it from " Scraps from the heart " here
I used Vix_Mask435 for this tag you can find it here
The font used is called A&S Christmas Script you can find it here
I used the amazing work of Suzanne Woolcott for the tubes you can find it here
Kristen what a sweet ScrapKit, you did a amazing job putting this one together it has a great style and class about it.
Keep up the good work
Hugs lee xx
-----------------------
I began this tag with a 800 x 800 image and added paper15, then went to layers load/save mask and selected my mask and hit load
Then l selected frame5 and paste it to the centre of the mask
Next l selected the tubes, they came from Suzanne Woolcott's range, both were resized to 200 and sent down below the frame
The frame then received a drop shadow of 4
Next l selected the Snowman and resized him to 200 and send him below the middle frame, adjusting it to fit
Flower3 came next once it was resized to 250 and put into place on the tag l send part of it below the frame, adding a drop shadow of 3
Frostystars1 was the next element l selected and after l resized it to 450 l added it to the top of the frame with a drop shadow of 1
Bow5 was the last element, l resized it to 260 and angled it on the tag with part being send down under the left corner of the frame.
Licence details are the last thing to add
Hugs lee xx
For this tag l used a amazing and sweet ScrapKit called " Frosty " from Kristen
You can find it here on her blog
You can purchase it from " Scraps from the heart " here
I used Vix_Mask435 for this tag you can find it here
The font used is called A&S Christmas Script you can find it here
I used the amazing work of Suzanne Woolcott for the tubes you can find it here
Kristen what a sweet ScrapKit, you did a amazing job putting this one together it has a great style and class about it.
Keep up the good work
Hugs lee xx
-----------------------
I began this tag with a 800 x 800 image and added paper15, then went to layers load/save mask and selected my mask and hit load
Then l selected frame5 and paste it to the centre of the mask
Next l selected the tubes, they came from Suzanne Woolcott's range, both were resized to 200 and sent down below the frame
The frame then received a drop shadow of 4
Next l selected the Snowman and resized him to 200 and send him below the middle frame, adjusting it to fit
Flower3 came next once it was resized to 250 and put into place on the tag l send part of it below the frame, adding a drop shadow of 3
Frostystars1 was the next element l selected and after l resized it to 450 l added it to the top of the frame with a drop shadow of 1
Bow5 was the last element, l resized it to 260 and angled it on the tag with part being send down under the left corner of the frame.
Licence details are the last thing to add
Hugs lee xx

I used a ScrapKit from Shani for this Scrapkit its called " Elves Workshop "
This ScrapKit began as a FTU for a limited time only, it is now PTU
You can find it here
I used a Mask from Vix_Mask435 you can find it here
The Font l used is called A&S Christmas Script you can find it here
Shani has another ScrapKit called " Elfin' Around " that has some of these elements in it yo can find that one here it is a PTU. This tutorial will show you how certain elements no matter what kit they come from to make a amazing tag.
Shani l found this a cute little Scrapkit to play with you did a amazing job
Cant wait to play with your next Christmas ScrapKit
Hugs lee xx
-------------------------
To begin with l opened a new image 800 x 800 and added pp2 then went to layers, load/save mask and selected my mask and hit load
Next l followed with the workshop which l did adjust the size of it once it was placed to the right of the mask and l added a drop shadow of 4
The tree was next once it was resized to 120 and placed to the right of the workshop l gave it a drop shadow of 3
The button cam next once it was resized to 40 - 50 l added it to the roof of the workshop and added a drop shadow of 2
Elf with cookies was resized to approxly 30 - 40 and set down below the workshops window with a drop shadow of 2
The elf with candycane came next after its size was also adjusted to 40 it was placed near the front door of the workshop and given a drop shadow of 2
Next came the snowdrift after resizing to 480 it was sent down below elfs feet at the front of the workshop
Tag2 was the last element added, after resizing to 100 it was angled and send down below the workshop on one end and send below the mask then given a drop shadow of 2
Last thing was the tube's l used, for this l selected Suzanne Woolcott's Fairies once they were all resized to 40 and placed on the tag l added a drop shadow of 2
Licence details were then added along side the wordart
Hugs lee xx
Subscribe to:
Posts
(Atom)
Midnight's Facebook
Click icon to view


